How to grow nails at home

Nails are the beauty of our hands. An indicator of the grooming and neatness of girls. However, nature does not reward everyone with beautiful, long, hard and healthy nails. Sometimes it happens that no matter what you smear or polish them with, they are still brittle, soft and constantly peel off. Today we’ll talk about how to grow your nails at home on your own.
Contents
How to do your own nails

In the modern world, girls often use such a procedure as nail extensions. It gives instant results - beautiful nails of the length of your choice. The result of the extension is the same, but there are a lot of materials. So the procedure can be carried out using gel, biogel, or acrylic. The latter is used extremely rarely, since acrylic liquid often has an unpleasant odor. And when applied to the nail, it is less durable than gels. Acrylic is used mainly for modeling, for which it is very convenient due to its ability to hold its shape well.
Extension can occur using tips or using forms. What will be more convenient for you, you can decide by trying everything through personal experience.
To grow your nails yourself, you first need to purchase the necessary equipment. Then equip yourself a place to work. Bright lighting is required.

To achieve a good result, be prepared to fidget for a long time and sit in one place. This work is painstaking and requires accuracy. It is possible that the result will not be perfect the first time, but everything comes with experience.
Whatever way you decide to grow your nails, the whole procedure can be divided into four steps:
- Manicure.
- Preparing the nail for extensions.
- Gel coating.
- Drawing (design).
Nail extension tools

To grow your nails and be satisfied with the result, enthusiasm alone is not enough. Here you will also have to spend a little money on purchasing the necessary equipment.
When doing nail extensions with acrylic you will need:
- Acrylic powder.
- Liquid.
- A file to give the correct shape.
- Tips.
- Nail glue.

When extending with acrylic, lamp drying is not required. It is worth purchasing only certified products so that your nails remained undamaged.
When doing gel nail extensions, the first thing you need to purchase is a UV lamp or, if possible, an LED lamp. The difference between them is that the second dries the gel much faster. However, when selecting a material, take into account the fact that there are gels that can only be dried in LED lamps. Look at the packaging carefully. And the difference in price is quite noticeable. If you do not plan to do nail services, then UV will be enough for you for home extensions.

The function of the lamp is to dry the gel evenly. There are a few things you need to know when choosing a lamp:
- For more convenient work, you should choose a lamp with a large number of light bulbs. This will make your work easier and save time.
- There are many types of lamps, but it is best to choose the one that will be more spacious.
- Choose a lamp that has additional functions. Such as a timer, or a fan.
- The optimal power for a UV lamp is 36 Watts; lamps with low power, although they are cheaper, dry the coating for a very, very long time.
The next thing you need is:
- the nail file is hard;
- soft file;
- buff;
- wire cutters;
- pusher;
- manicure sticks;
- brushes;
- brush;
- forms (you can use tips).
Despite the fact that gel extensions require much more tools and time, it is more convenient and the result lasts longer. And thanks to the use of forms rather than tips, the nails look natural.
How to extend nails with gel

To extend your nails yourself with gel using forms, follow the following instructions:
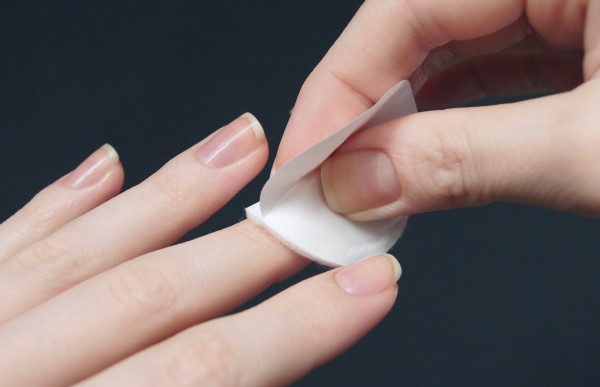
- First prepare your nail. Make a trim manicure, take a file and grind off the top layer a little. It is most convenient to do this with the hard side of the buff.
- Then degrease the nail using a special product. It’s called “degreaser” and is sold in all nail service stores. You can also degrease the nail using regular Asseptolin (95% alcohol).
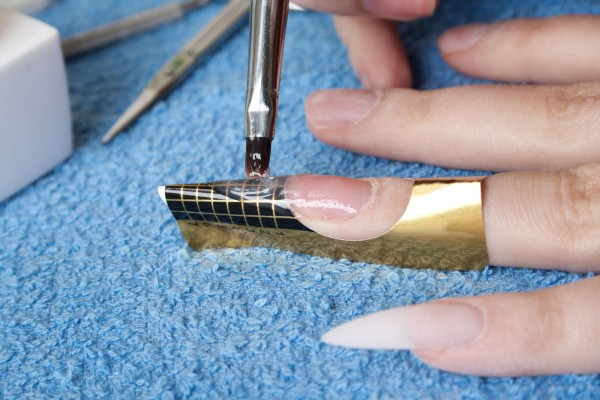
- Now take the form and attach it well to your nail. Remember when doing nail extensions that if you had small nails, you will have to cut them off. Otherwise, they will interfere with the extension.
- The next step is to apply the base, the so-called TOP Gel. Distribute the gel into the forms to the length you want to increase. And dry it in a lamp. The drying time is always indicated on the packaging or the jar itself. But most often, two minutes is enough.
- Remove the forms and dry your nails a little more.
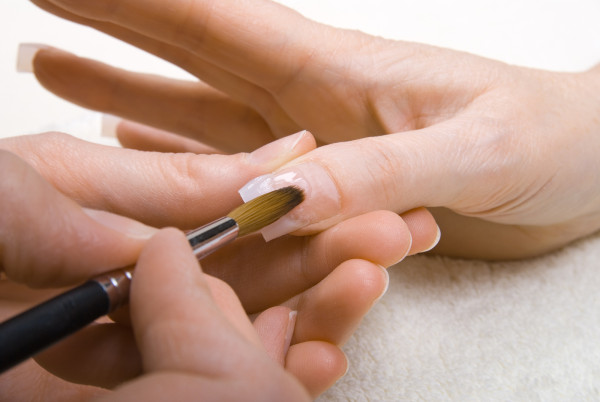
- Now you can apply the main gel. Try to lay it out in a small layer, but evenly. Make sure that the gel does not spread and lies flat on the plate. To avoid difficulties, masters do this: apply the gel to the nail and immediately dry it in a lamp for a short amount of time so that the gel has time to set. This is done with all fingers. The most important thing is to make the nail as smooth as possible. This way you will have less work to do when filing.
- After the gel has dried, it is necessary to remove the sticky layer from it using a degreaser (asseptolin); ordinary nail polish remover may also be suitable for this purpose.
- The sticky layer has been removed, the time has come for the crucial moment. Now you need to file your nails and give them shape. To make this much easier, initially, when laying out the gel, try to make a small hint of the shape.
- Having finished cutting out the shape, you need to degrease your nails again. And you can start designing. It all depends on your imagination.
- Dry your nails.
- Now the final part. Apply Finish Gel to beautiful nails. Dry it in a lamp. Remove the sticky layer (if the gel contains it) and marigolds ready.


