How to do a moon manicure at home

No wonder they say that everything new is well forgotten old. In the 20s of the last century, fashionistas, painting their nails at their own peril and risk, left a small distance along the nail hole, covering the tips with bright red or pink, thereby showing that they did not allow themselves indecent liberties. Fortunately, in our time, women have no restrictions in design and style, but this type of manicure has remained fashionable and popular.
Contents
Lunar manicure at home: step-by-step description
Lunar manicure can be done in almost any salon or nail studio. But many girls have become so adept that they do it themselves on their own hands. In fact, there is nothing complicated about this and after reading this article you will be able to do such a manicure, avoiding all possible difficulties.

Like any other type of manicure, regardless of whether you cover your nails with regular nail polish or use shellac or gel polish, your hands need to be prepared by removing all irregularities and roughness from the surface of the nails and the skin around them, polishing and trimming the nails to the same length, and degreasing when finished. By the way, for several seasons now, short, neat nails, with a slightly protruding free edge, have remained in trend. For more information about all these stages of preparing the nail plate for any further coating, you can read here.
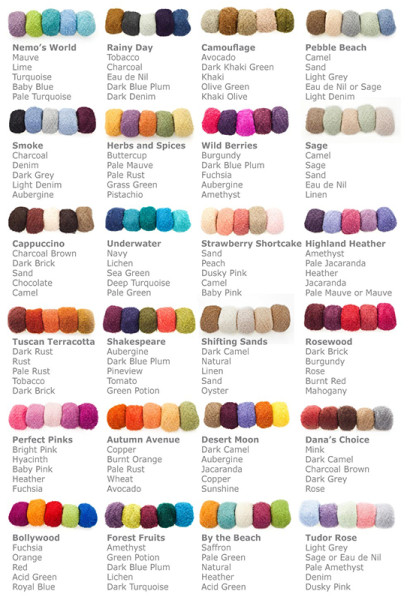
- Decide on the shades you want to use in your moon manicure. The classic option in retro style What remains is an unpainted lunula of the nail and bright, contrasting shades from fuchsia to rich red or dark burgundy. The figure shows the ideal combinations of shades depending on the color scheme.
- Apply a base clear coat to the prepared, treated and degreased nail plate to avoid unevenness in the base layer of varnish. Let it dry completely.

Next, proceed depending on the lunar manicure design you choose.
- Classic moon manicure in retro style.
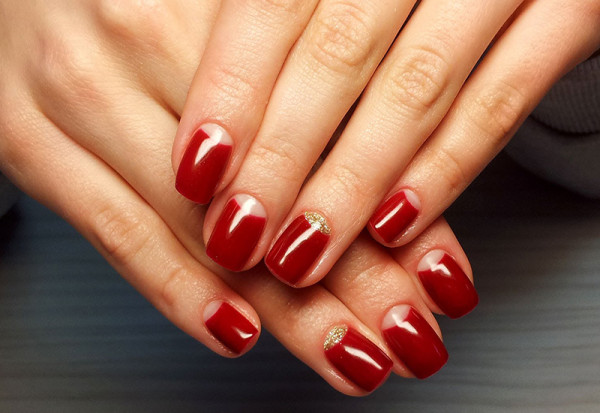

Apply clear polish to the prepared nail surface. Let it dry completely and cover the nail with an even layer of rich, thick polish in red shades. Once completely dry, apply another sealing coat of clear varnish.
- Option with colored, contrasting lunula.
 If the texture of your nail polish is thick and dense, then paint the entire nail with the color you planned to use for the main top coat.
With a very thin or, conversely, wide brush, paint a hole on each nail with colored varnish after the bottom layer has completely dried.

Secure the layers with clear varnish.
If you understand that by applying two selected varnishes to each other, they will merge or become transparent, then first draw neat holes, and after they have completely dried, paint over the main part of the nail with a contrasting varnish. Don't forget to seal the layers with clear varnish.
Stencils for moon manicure
Modern fashionistas are much luckier than their predecessors in the 20th century. After all, as soon as a trend becomes more or less popular, all sorts of auxiliary accessories immediately appear on the market in this area. Marilyn Monroe could only dream of this!
With the help of special stencils for moon manicure, you will create the perfect design on all fingers in just a few minutes.
The principle of operation is almost the same as using a brush.

- Apply a base clear coat.
- Wait for it to dry completely.
- Apply the polish you prepared to color the lunula over the entire surface of the nail.
- Let it dry completely.
- Apply the stencil evenly to each nail as if it were the final result.
- Paint the rest of the nail with your base polish color.
- Without waiting for it to dry, remove the stencils and then wait until the layer dries well.
- Secure the layers with clear varnish.
If you have chosen the option with a classic lunar manicure, where the lunula of the nail will remain unpainted, then skip steps 3-4 and go straight to step 5.

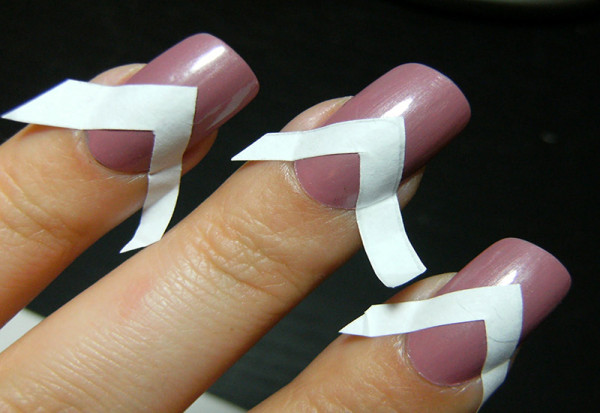
Stickers for moon manicure
You can make such stickers for moon or French manicure yourself using ordinary tape.
You will need:
- narrow or wide tape (you can use colored or transparent);
- sharp manicure scissors;
- gel pen or thin felt-tip pen.

- Cut a strip of tape 3-5 cm long.
- Glue it onto the table surface.
- Cut another strip of the same size.
- Glue it on top of the first, stepping back a little from the edge.
- Considering that from each strip of wide tape you will get 2 stencils, and from each narrow tape one, cut and stick the required number of such strips on each other.
- Carefully peel away from the table.
- If you used wide tape, then cut it lengthwise into 2 narrow strips (so that the indentations of the layers remain on top) and glue them exactly along the edge on top of each other.
- Draw the future stencil with a gel pen or felt-tip pen, at your discretion.
- Cut them along the contour with nail scissors.
- Use by tearing off the convenient tip from the side indented from the edge.


Moon manicure for short nails: features of execution
As we already wrote above, long nails have long faded into the background. Young modern women choose a short, neat manicure.
Moon manicure, or, as it is often called, an inverted French manicure, not only visually lengthens the nail plate, but also makes the fingers visually thinner, making a woman’s hand look more elegant.

