Diy napkin figure: master class with photo

Making a festive interior with your own hands today has become a very fashionable trend. You can do anything: letter and flag streamers, large numbers, funny guest caps, and more. Such paraphernalia creates a fun atmosphere and looks great in photographs. Most often, jewelry is made on children's birthdays... In this master class, I will tell you in detail and show you how to make a volumetric figure from napkins.
Content
Number from napkins: materials for making
The napkin figure is a rather "budgetary", but at the same time an effective element of the festive decor. The main materials for its manufacture are thick cardboard and ordinary paper napkins.
For the frame, we need sheets of thick packaging cardboard (corrugated cardboard), so an old unnecessary box from household appliances will come in handy here. I found a box with dimensions of 50 × 30 cm.
Napkins - we will make delicate flowers from them. They come in different sizes and quantities in a package. It is very difficult to predict in advance how many of them will be needed, here you need to focus on the dimensions of the cardboard for the future figure. But it's best to take one or two packs in reserve. Indeed, in the future they will be useful for decorating a festive table. For my figure, I purchased 4 packs of red napkins and one of white ones (in fact, it took 2 of them).

We will also need auxiliary materials:
- Large scissors or a construction cutter.
- Wide tape.
- Stapler and staples for him.
- The glue is a universal moment.
- A sheet of cardboard "like gold" for decoration (I have a holographic one).
How to make a volumetric figure from napkins
To begin with, I would like to note that numbers from napkins are flat and voluminous.
Flat products are made faster, since you do not need to glue the frame, you just need to cut out the outline from a sheet of cardboard. And also it will take several times fewer flowers to decorate it.
The volumetric figure will take more time and materials. However, she will justify the effort spent with her spectacular appearance.
In today's master class, I will tell you how to make a three-dimensional figure "two". The whole manufacturing process can be divided into 3 stages. I will describe each of them in detail below.
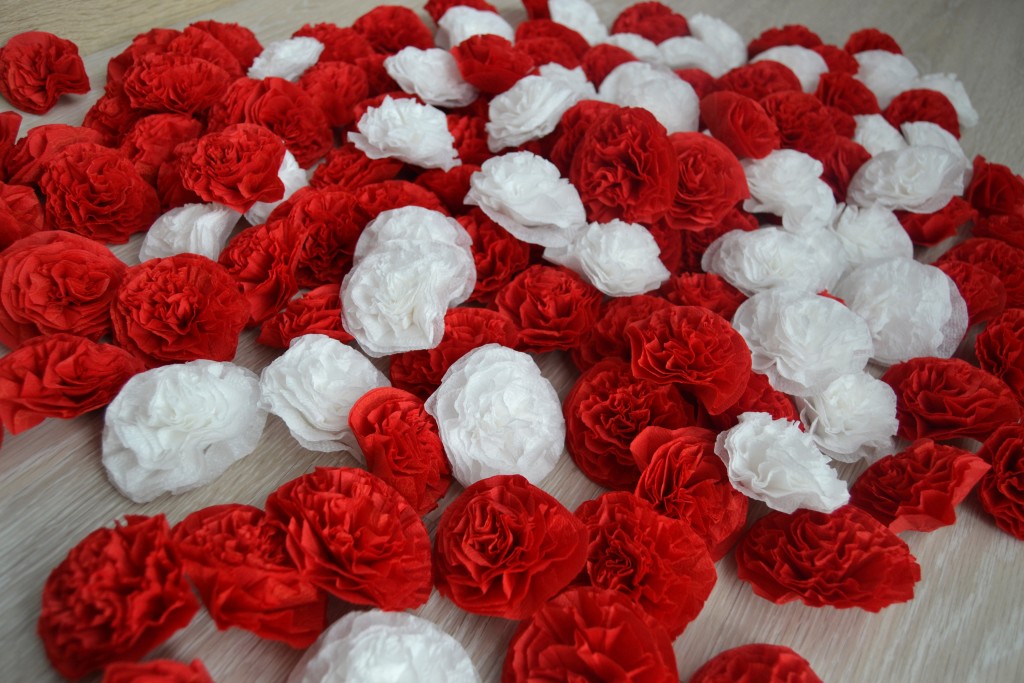
Making flowers from napkins
This stage is very simple, but it takes a decent amount of time, since a lot of flowers will be needed. If you have assistants, then I advise you to involve them in this case.
I started with red napkins. They are two-layer, and their unfolded size is 33 cm, so 2 flowers are obtained from one napkin.
So, the flower is done as follows:
- We take one napkin and cut it in half.
- Fold the halves in half again and cut again.
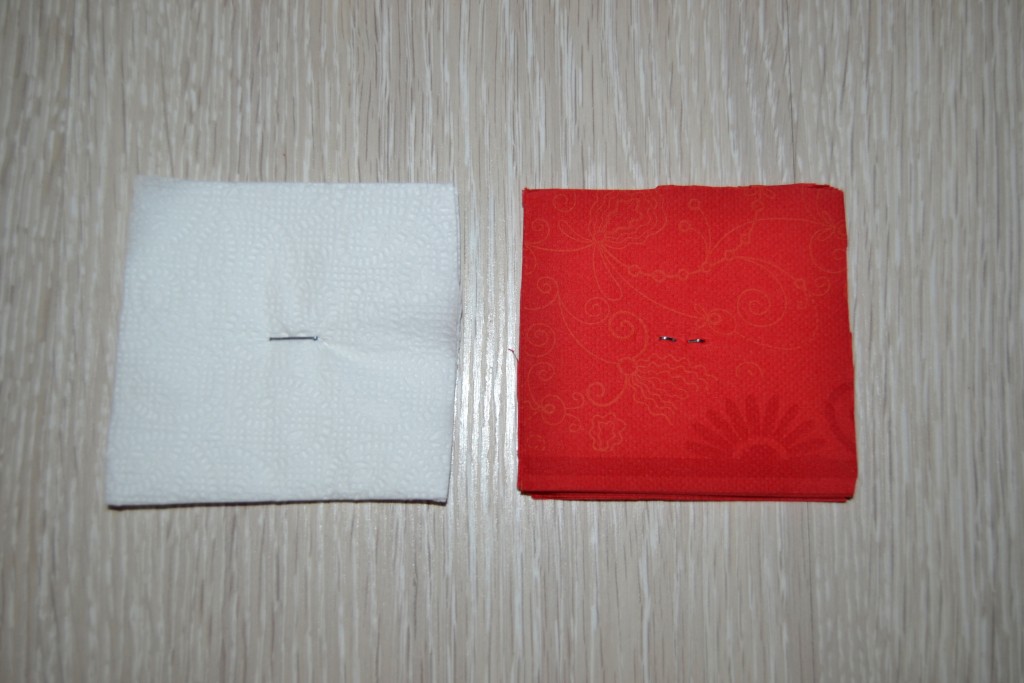
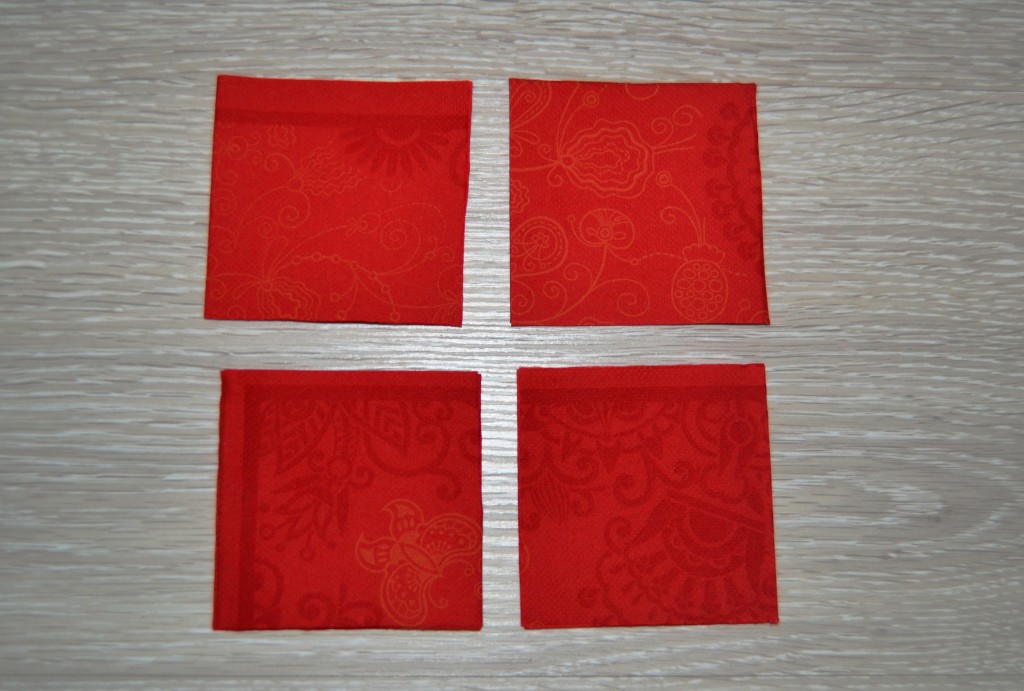 Fold 2 quarters together and staple them in the middle with a stapler.
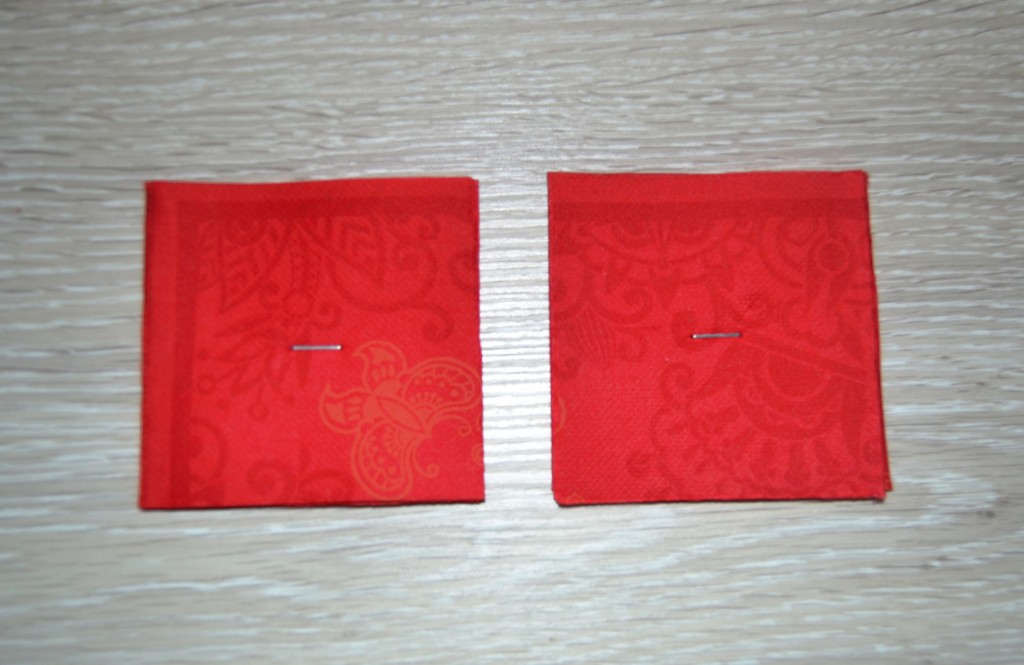 Then we cut out a circle from the square. I do it "by eye".
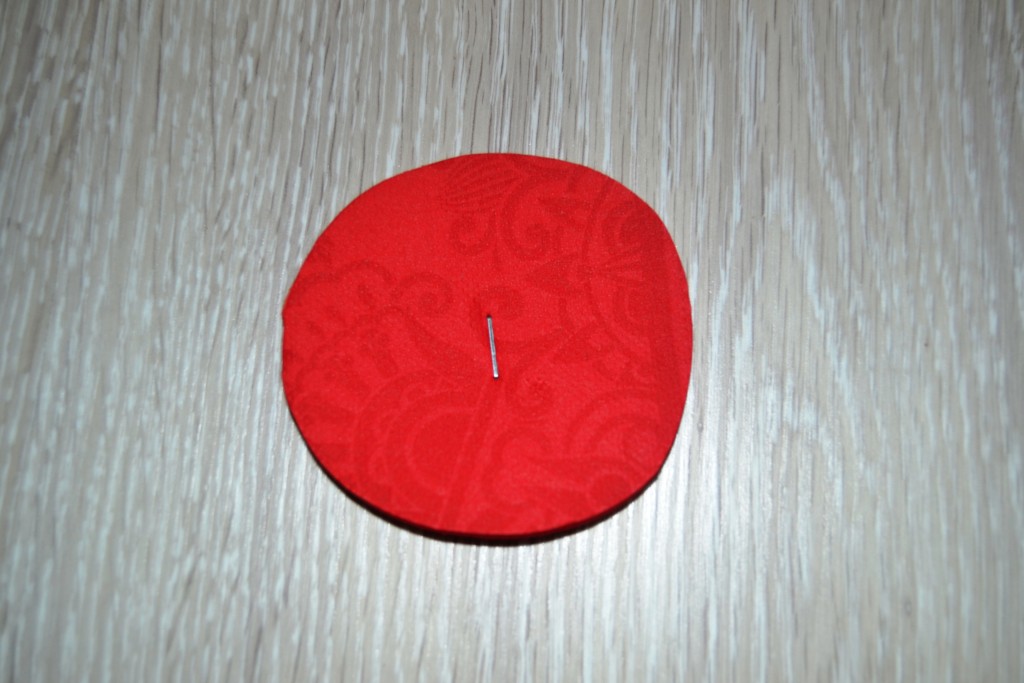 Next, with your fingers, squeeze each layer in turn, starting from the top. To make the flower more delicate and lush, it is very important to squeeze them strongly at the end, as shown in the photo.
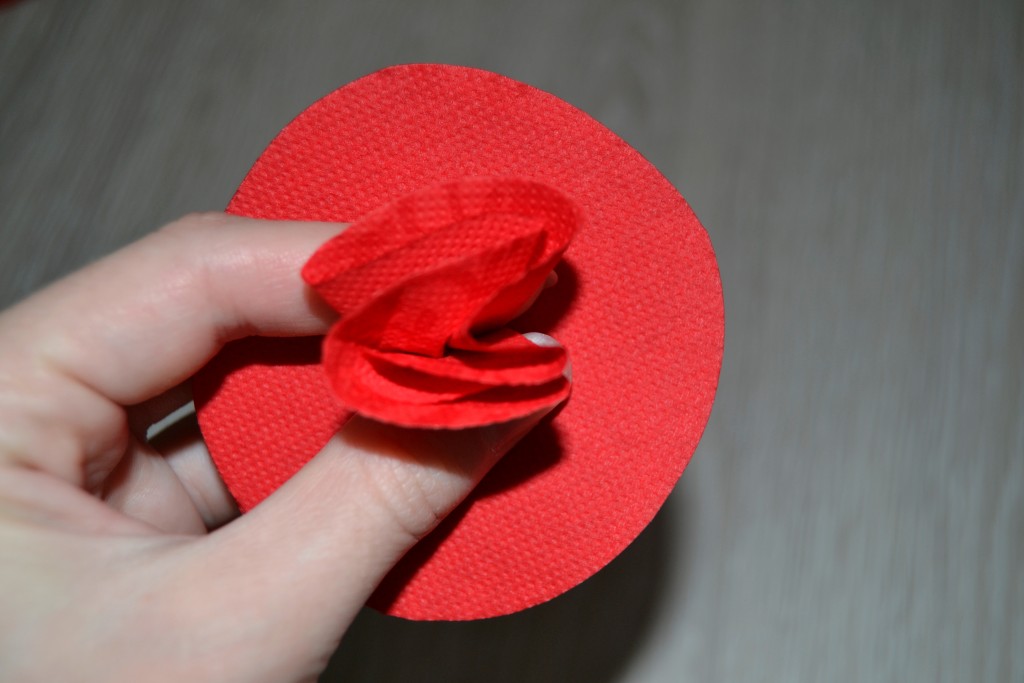
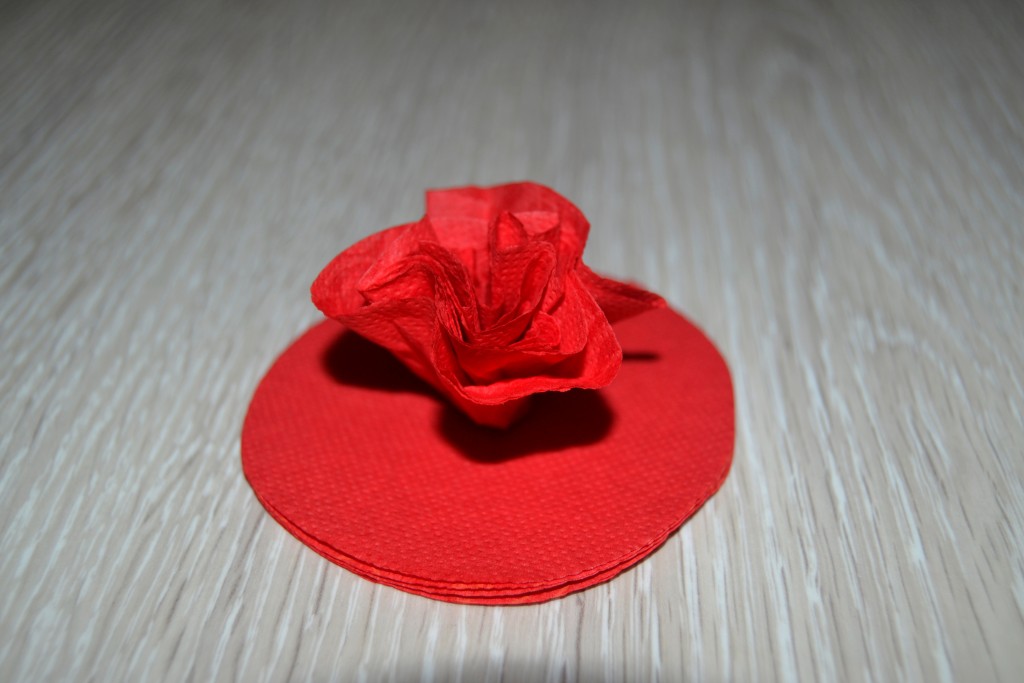
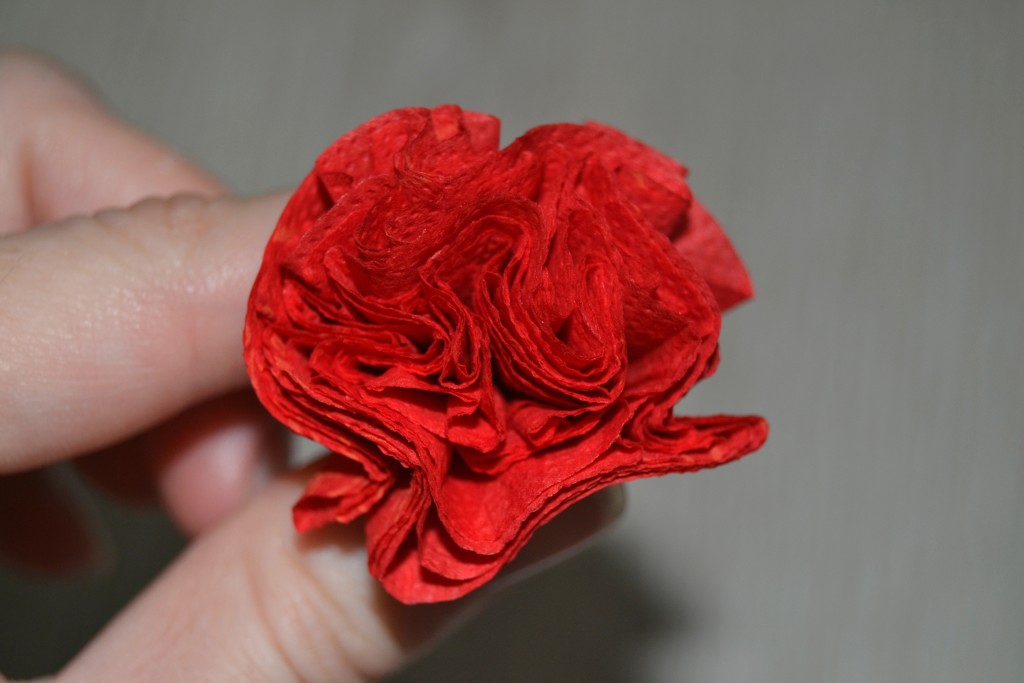 We unfold the flower, carefully spreading the petals. This is what happens in the end.


To optimize the process, at first I made a lot of these blanks, which then turned out to be beautiful flowers.

White flowers are made according to the same principle. However, the white napkins I have, as opposed to the red ones, are single-layered and smaller. Therefore, in order for the blanks to be of the same size, I had to put a little more effort:
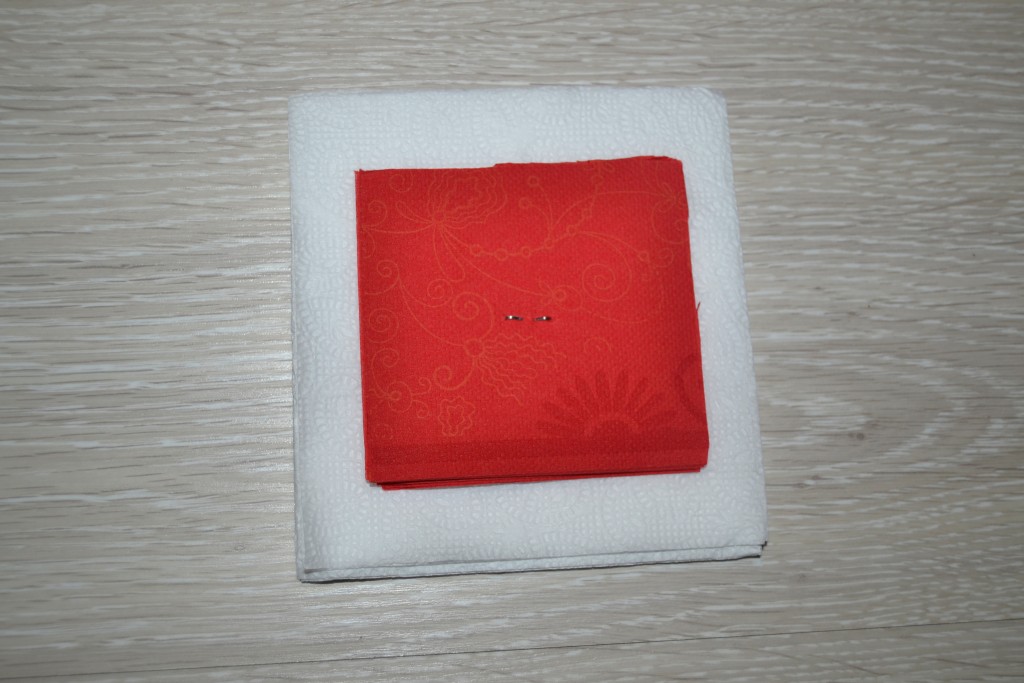
- I put 3 white napkins together, and on top of them I applied a red square of the desired size and cut out the workpiece along its contour.
 Then everything is done according to the above scheme, and the result is such a delicate flower.


In total, to decorate the number, I needed to make 86 red and 65 white flowers. This took about 4 hours.
We make a frame made of cardboard
In order to build a volumetric frame, I needed 2 sheets of corrugated cardboard with dimensions of 50 × 30 cm. I cut out the front parts of the "two" from them. The remaining scraps from the box went to the side of the figure.
The procedure was as follows:
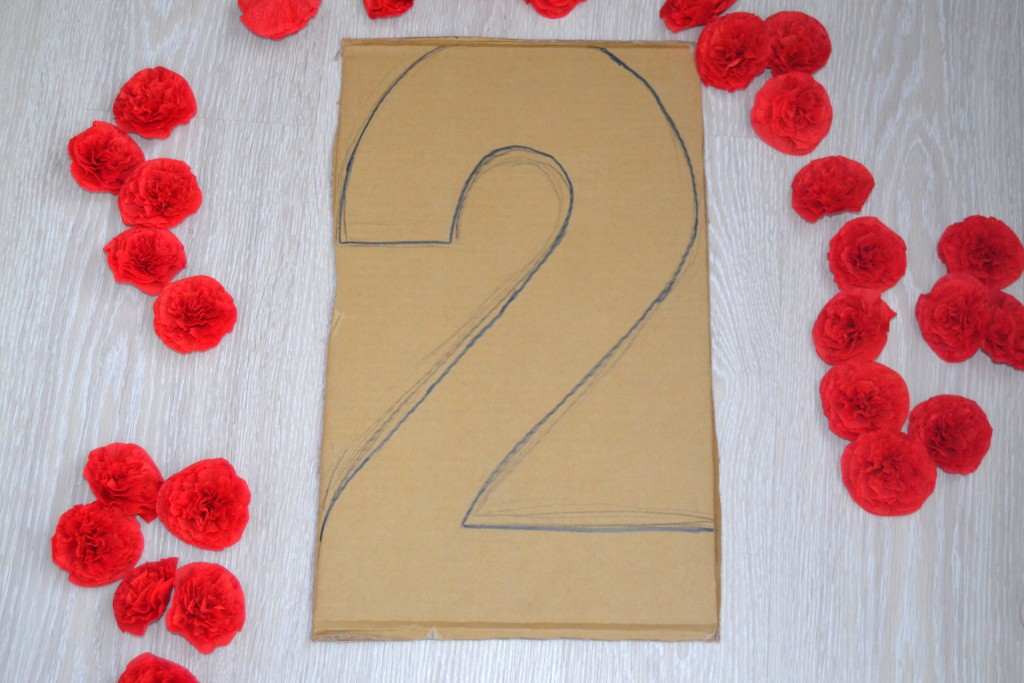
- First, on one of the sheets, I drew the outline of the number "two". I determined its width, focusing on the number of rows of flowers that can be glued to it. Another condition is that the figure should look proportional. Based on the size of my cardboard, I got 2 rows of flowers. Therefore, the width of the figure around the entire perimeter turned out to be 9 cm.
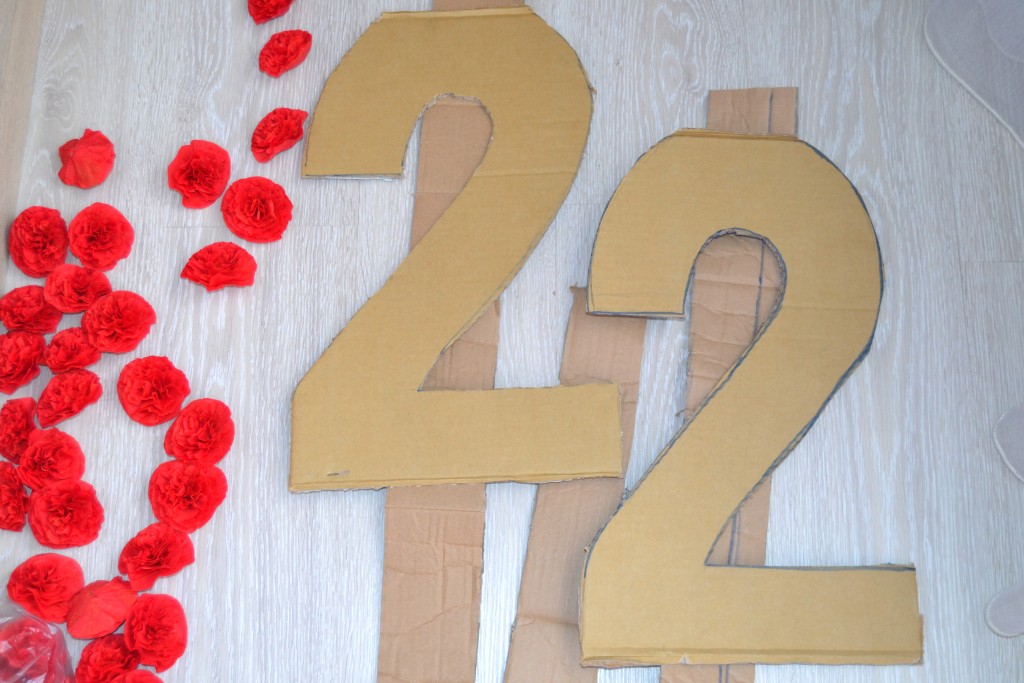
 Then I cut out the “deuce”. Since the cardboard was very dense and hard, I used a construction cutter.
- I put the resulting number on the second sheet of cardboard, traced it around the contour and also cut it out.
- Next, I made blanks for the side of the product. To do this, I measured and cut out strips 9 cm wide from cardboard. Tip! The longer they are, the more convenient it will be to stick them.
 Using scotch tape, in pieces about 10-12 cm wide, first glue one half of the "two" with strips for the side part. Here I want to note that I used cardboard on the sides, which was a frame inside the box, but it turned out to be softer and more flexible. Thanks to this, it was easier to bend and glue it along the contour of the "two". Intermediate results are visible in the photo.
 In a similar way, we glue the second part of the "two". Here's what I got as a result.


We collect and decorate the number
Next, we begin to glue the flowers onto the frame. For this I use the Moment universal glue-gel, as it is colorless and sets quickly.

In order not to wrinkle the flowers, I lightly press on them from above, and then gently press their base under the petals with my finger.


When the glue is dry, straighten the flowers to make them look fuller.
The design of the number can be anything, it all depends on your imagination and the color scheme of the napkins.
I decided to decorate my "deuce" with a crown. To simplify the task, I found a ready-made stencil of suitable sizes on the Internet, printed it and cut it out.
Since my number is two-sided, the crown should be the same. Therefore, I circled it 2 times on a sheet of A4 holographic cardboard.

Then I cut out both halves and glued them together. As a result, it turned out to be "golden" on both sides.

At the final stage, I solemnly “crowned” my number, carefully gluing it to the flowers. Ready!

By a similar principle, you can make absolutely any number or even a letter.


It turned out very nicely!)
You are great!) And thank you very much for such a detailed master class !!!)))
Very beautiful, but I don’t understand why to do double work ?! you can immediately fasten the napkins without cutting them, then cut out the circles from them anyway!
I did everything according to your plan, but for some reason flowers do not stick to the base. Bad glue?
Hello! Yes, most likely you used an inappropriate glue. In my experience, the best and most reliable options are: Moment-Gel universal glue (used in this master class) or Moment Crystal. They are suitable for all surfaces, including quickly and very firmly gluing paper flowers to tape.
Hello. You've got a wonderful figure)) tell me, but on the back, what was it pasted over or left the cardboard like that?
Good afternoon, Evgeniya P! The number is pasted over with flowers from napkins on all sides.
Cool master class !!! I was just looking for one, but to be honest, how expensive these tsiferki are, and then there is such beauty, it is inexpensive and more pleasant to do a double with your own hands !!! Thanks!!!
Good laziness. How many packs of napkins have you left?
Good afternoon. Consumption was 4 packs of red napkins and 2 packs of white napkins.
It turned out very nicely. Thank you
Good day! Tell me, but leave the very bottom of the figure, that is, what it stands on, just cardboard?
Good day, Natalia! Yes, cardboard, which you can additionally seal with colored paper.