Decorating the cake with mastic
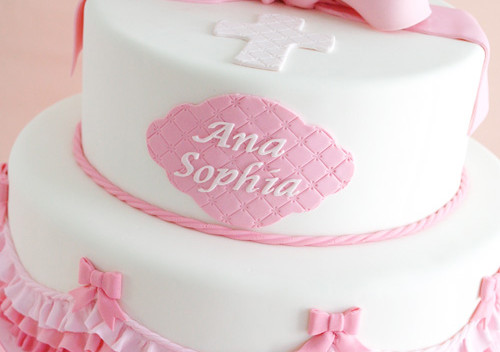
What beauty pastry chefs will not come up with to decorate a cake! Fantasy can be limitless. And sometimes you really want to repeat it at home, but you don't know how? We will give the answer in the article and tell you what items you need to use to work with mastic, the best recipes and modeling technology.
Tools for working with mastic
Mastic requires a careful attitude towards itself and does not forgive mistakes. Newbies rarely get it right the first time. It takes practice and a lot of patience. Better luck for those who know how to sculpt well and present a phased assembly of the composition in advance.
Reviews of the masters suggest that it is easier for beginners to learn how to sculpt from mastic made from marshmallows, and then start cooking from gelatin or condensed milk. But if you don't like the taste of these sweets, then try other recipes right away.
Many different tools are needed to work with mastic, but only if you are going to do private baking. For lovers, it is not necessary to buy a huge set, since you can find a lot in your kitchen or borrow from your child from a set of children's dishes.
And so, we list the required tool in descending order of need:
- Rolling pin. It should be made of plastic and flat. There are curly rolling pins, but this is for professionals and creating masterpieces.
- Silicone rugs. One large and one small. On the big one, layers are rolled out for wrapping the cake, on the second, figures are molded. But if you want, you can do with one. The main thing is no seams.
- Knife on a wheel. If you have a pizza knife at home, then it will work too.
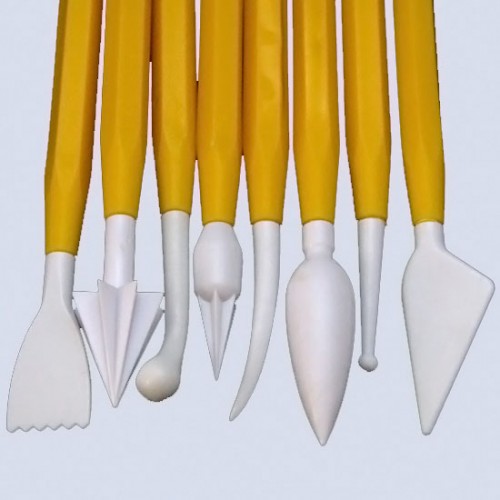
- Stacks or a set of tools for creating flowers, shapes with grooves - ball, bone, Dresden stick, cone, star, groove, shell, needle.
- Felling, i.e. the semblance of a volumetric stencil. Useful for creating complex colors and compositions.
- Silicone molds. Basically, these are ready-made forms of complex shapes, for example, a guitar, a crown.
Going to the site for the sale of a tool for working with mastic - your eyes run up! But do not rush to colorful forms, think, do you really need all this? After all, everything is not so cheap and it is better not to waste your money.
How to sculpt from mastic
After you have mixed the mastic, start sculpting. If the mixture stands, it will be very difficult to mold from it, as it will harden.
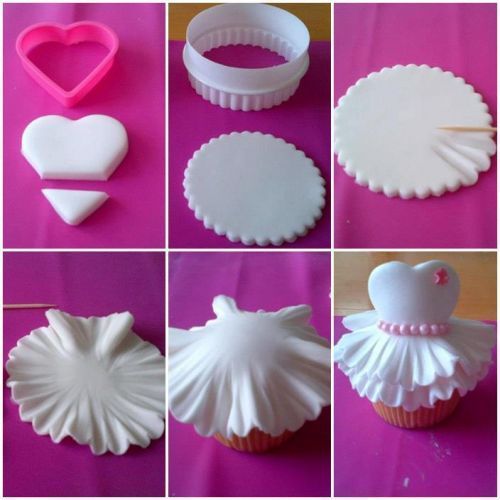
Beginners should start with simple shapes such as balls or gift cubes. As you master the technique each time, you can tackle more complex objects. Stencils or stamps will just come to the rescue. They make it easy to create the composition you want and look perfect.
For example, you can make a bouquet of flowers:
- Choose the shape you like.
- Roll out a layer 2-3 mm thick.
- Place the mold on the mastic and press down on it.
- Gently remove the rest of the mass and transfer to the cake.
- If you need to combine flowers into a bouquet, then moisten the edges of the mastic with water using a brush.
If the composition assumes a large figure in height, then a toothpick is required for fastening. For example, connect the torso and head.
How to decorate a cake with mastic
Decorating the cake and not spoiling the appearance is the main task of the hostess.
First, bake a cake to decorate. After it has cooled, place a press on top and leave in the refrigerator for an hour. This is necessary so that the mastic lies flat and the cake is completely saturated with cream.
For the top layer, prepare cream from condensed milk and butter. Remember, the oil must be natural. Do not buy a spread, otherwise the mastic may melt.
Make the cream according to the following recipe:
- Place the butter in a plate and let sit for an hour.
- Beat with a mixer until white.
- Add half a can of condensed milk and beat until smooth.
The cream is ready. Now you can start the first stage of cake decorating:
- Apply the cream to the top layer of the culinary masterpiece and smooth with a spatula to avoid lumps and unevenness. Place the cake in the refrigerator for 30-40 minutes. Then remove and level the surface again with a hot knife. After obtaining a 100% flat surface, start rolling the base. The circle or square (depending on the shape of the cake) should be 1.5-2 times larger. Place the blank on the top layer of the cake and smooth the surface, but do not crush, otherwise pits may appear.
- Trim excess mass. Remember, the edges should be smooth and free of dough streaks.
- Form the decorations that you came up with in advance. By the way, it will be useful to watch master classes on making figures from mastic. Thus, you will assess your ability to make complex shapes. And perhaps you will find life hacks that will facilitate the preparation.
Remember, it is better to put the finished product on the top shelf of the refrigerator or in a cool place. Condensation may occur with a sudden change in temperature. It can, of course, be removed with a dry brush, but fragile shapes can be damaged.
